
How to Create Variants on Products
Introduction
If your products come in multiple variations—such as different sizes, colors, or materials—you'll need to create variants to keep everything organized in your webshop. Variants help ensure a smooth shopping experience by grouping similar products together while allowing customers to choose their preferred option easily.
In this article, we'll guide you through the process of creating and managing product variants in Turis, ensuring your webshop is both user-friendly and visually appealing.
What are Variants?
Variants are, as the name implies, different versions of the same product. They are products that are largely identical but differ in one or more ways. A variant could be based on size, color, dimensions, or weight, for example.
If you sell products with different variations, this is the article you need. Here, We'll show you how to create and manage your variants and choose how they’re displayed in your webshop.
How to create Variants
To create variants on products head to your products section in Products > Products, as this is where you can manage all data on your products. From here, either open an existing product you want to create a variant on or add new product. When creating variants on a product, you need to look for the 3 fields on the productcard; Variants, Variants Title (Color, Flavor, Style) and Size/Color.
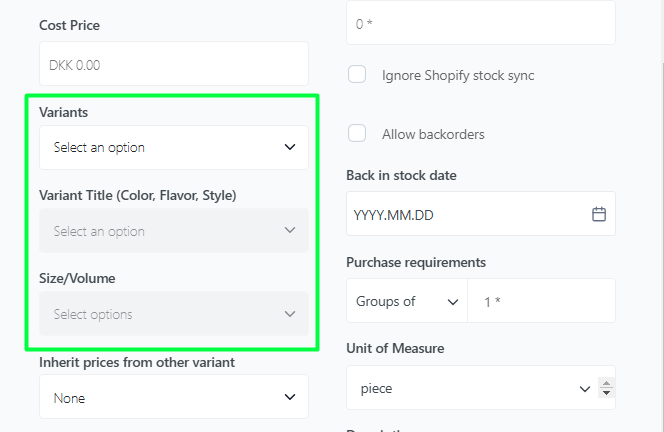
Fields on the products
The 3 fields Variants, Variants Title (Color, Flavor, Style) and Size/Volume. all has different purposes - Please see below;
Variants: This is the field that will connect all products to the same variantgroup and should be same across all products which should be grouped together.
Variant Title (Color, Flavor, Style): Here you specify what's unique to this products variant, such as color, weight, material, style.
Size/Volume: This fields defines and extra level to the variant, like size or volume, e.g. "Small", "Medium" or "Large"
When creating variants on products in Turis i'ts important have in mind, that all 3 must be filled, to successfully create variants. In some cases filling the field size/color, is not always relevant - In this case we recommend entering the information from field "Variants" to "Size/Volume"
Examples
Let's take a look at a few examples;
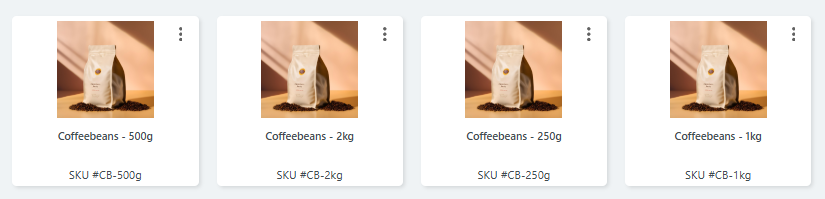
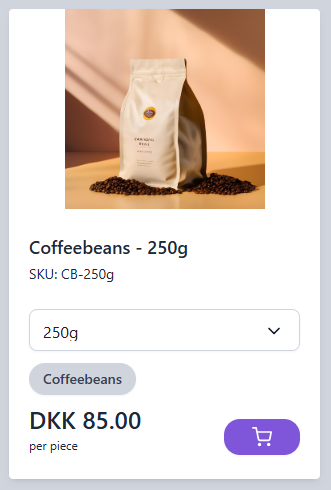
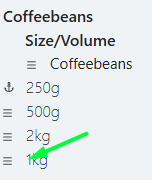
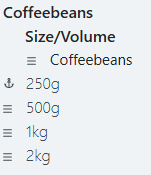
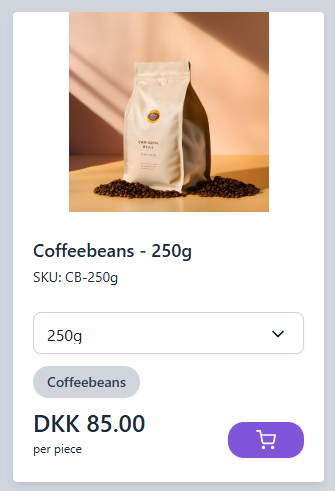
#1 - Coffee in different sizes
In this example we would like to groups multiple sizes; 250gr, 500gr, 1kg and 2kg, coffeebags together, to give the buyer a simple overview.
To start we have all different variants created as individual products;
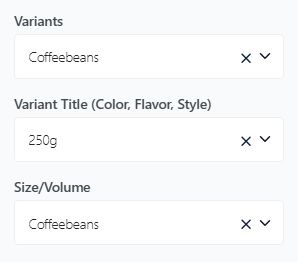
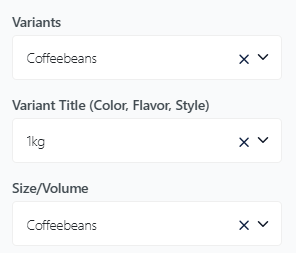
Then we will manually need to go through each products to create the variants by filling the 3 fields; Variants, Variants Title (Color, Flavor, Style) and Size/Volume - For these products, this could look like so;
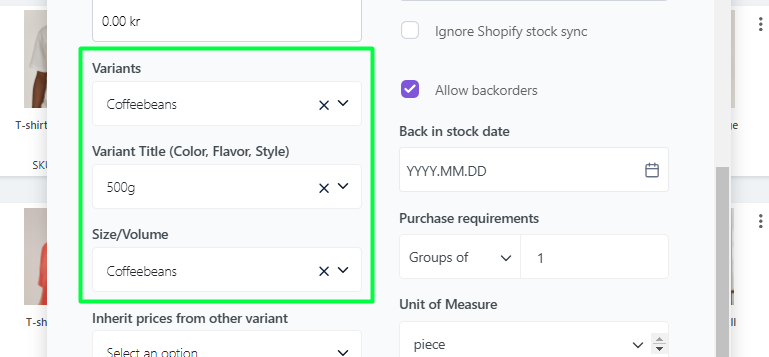
Now, continue to fill the rest of the product according to this using the same name in Variants, while changing the information in "Variant Title";
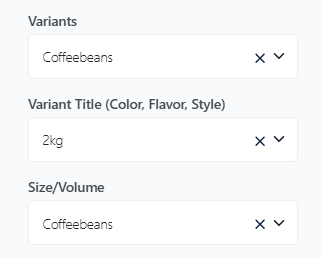
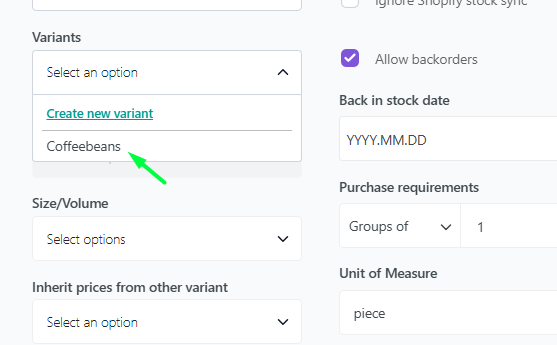
*When the first variant of the variantgroup is created, make sure to choose from the drop-down in "Variants" for the next products, instead of creating a new variant;
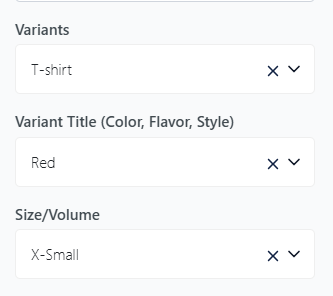
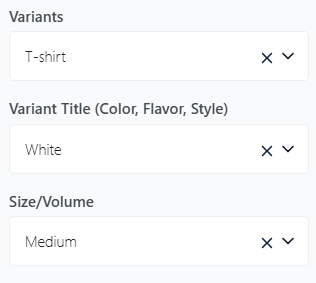
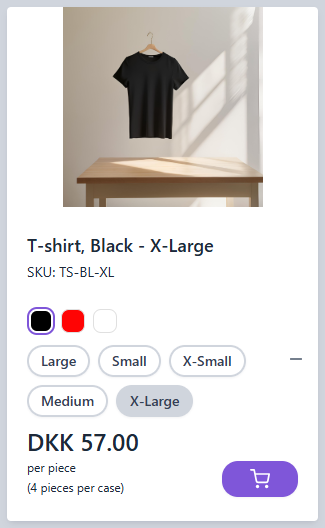
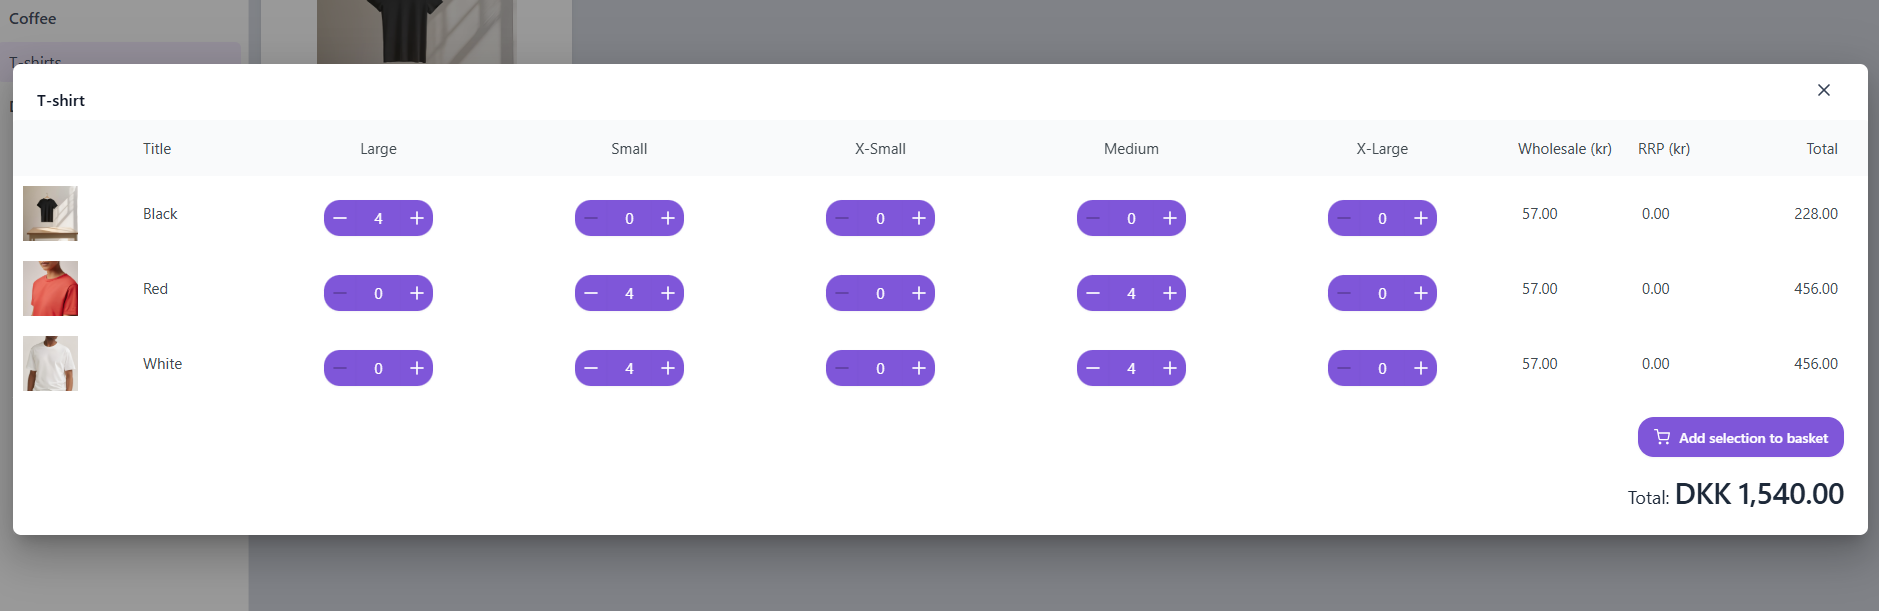
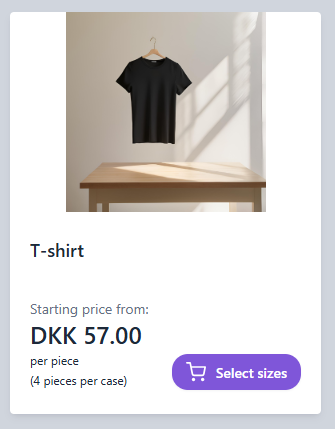
#2 - T-Shirts in different sizes and colors
For this example, we have T-shirts in 3 colors and 5 sizes we want to gather into one variantgrou - To start, as with coffee, we have created all variants as individual products, meaning each color and sizes is a individual product.
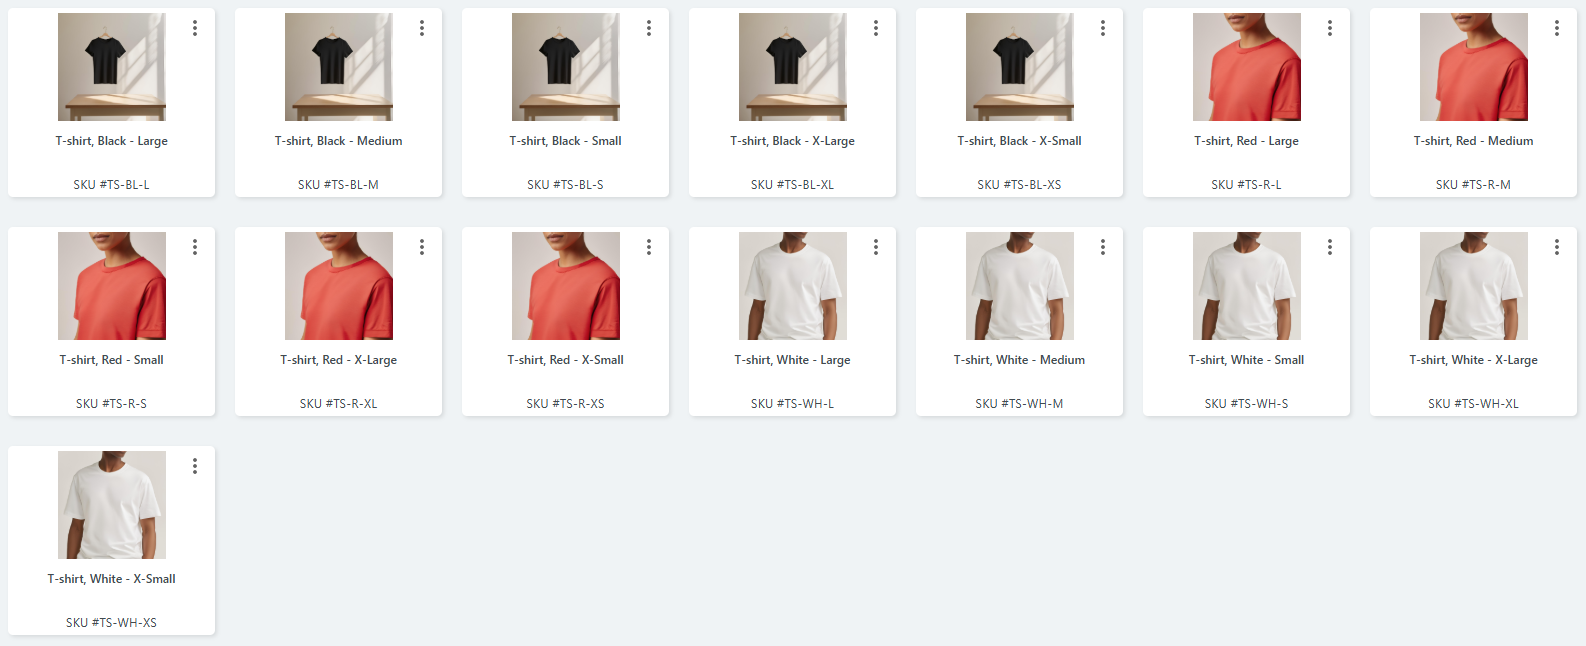
Now we can get started on filling out the 3 variants fields on each product - A few examples will be shown below;

*When creating variants in these quantities, we do recommend using our bulk uploader for more effiancy - An example to use our bulk uploader will be included further below in this article.
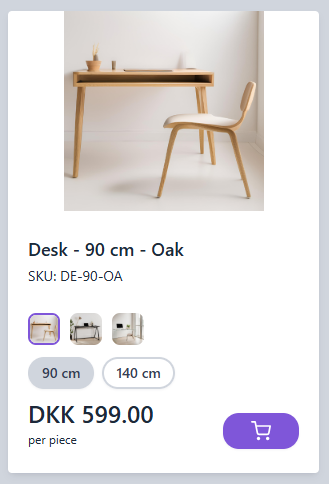
#3 - Desks in different materials and sizes
Once again, we start out with the each individual variant created as a stand-alone product;

Then we go into each product and add the variants, for these types of products this could like so;
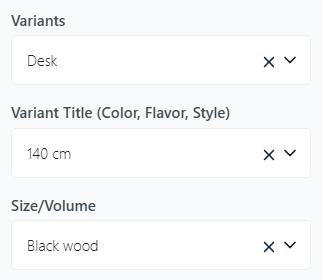
Alternatively, we could switch the information in Variant Title and Size/volume. This depends how you want your buyers to choose the products - such should they choose desk length or color first?
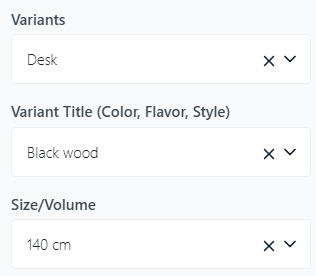
Should length be chosen first, add length to Variant Title, conversely, if you want color to be chosen first, add the color to Variant title.
Now when all Variants are created on the individual products, we are ready to choose how we want to display these to our buyers.
Change Display of Variants on buyerside
When it comes to displaying the variants to your buyers there are a few different options to choose from;
Thumbnail images
Color Swatches
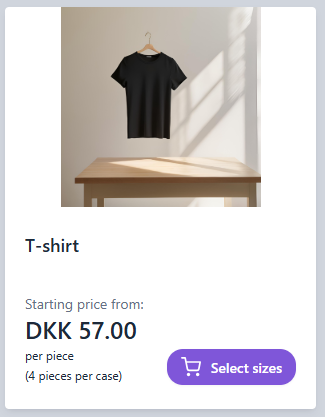
Drop-down
Line-view (can be combined with Thumbnail images or Color Swatches)
Here's Line-view is combined with Thumbnail Images;
Here's Line-view is combined with Color Swatches;

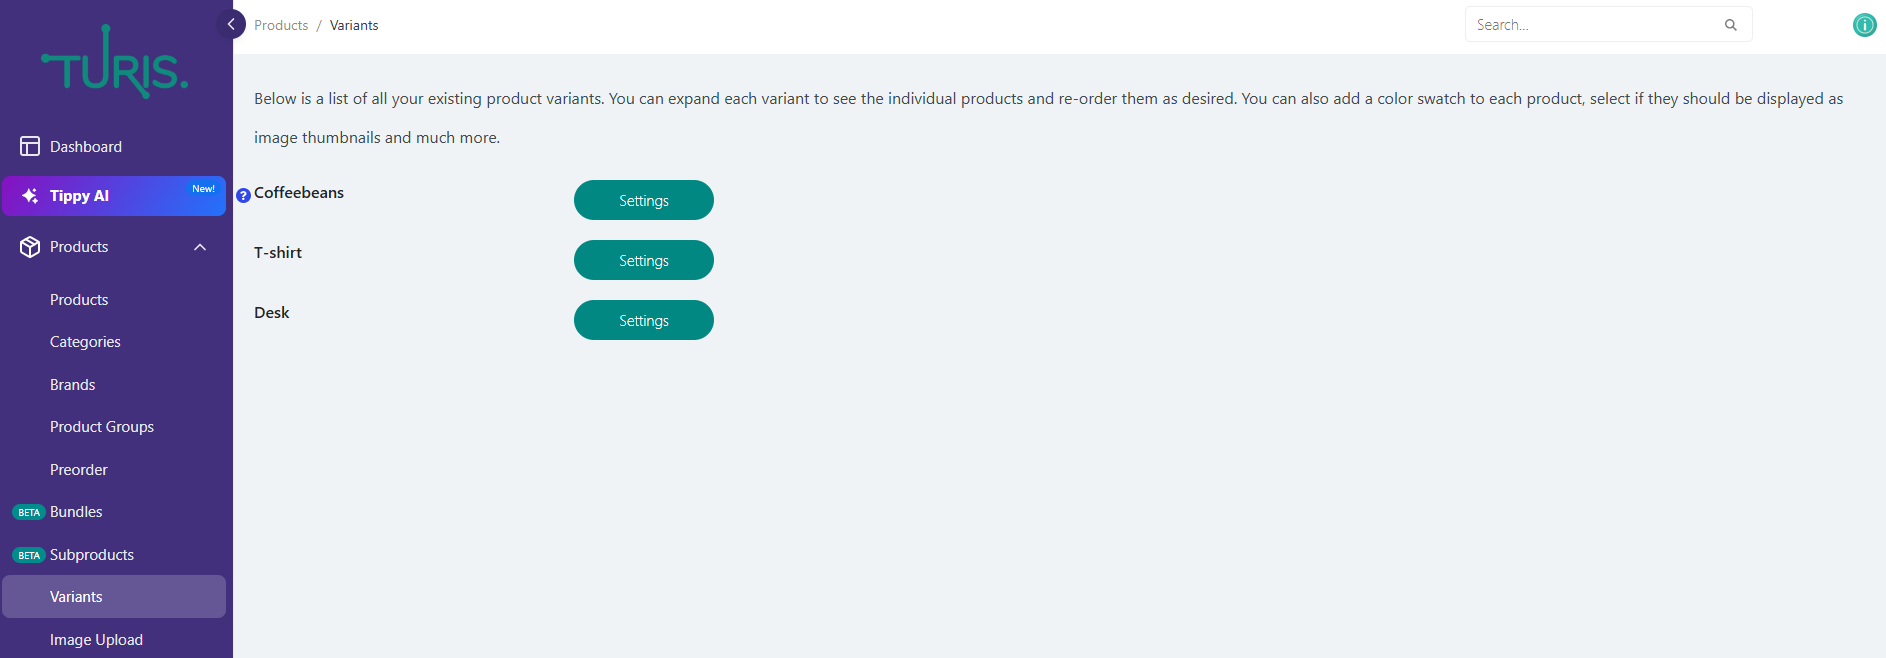
How to change variant display
To change the display of the variants head to Products > Variants. Here you'll see all variants that are created on your products - New variants added to your products, will always be listed last in the list.
Click on Settings and a pop will open enabling you to edit this variant;
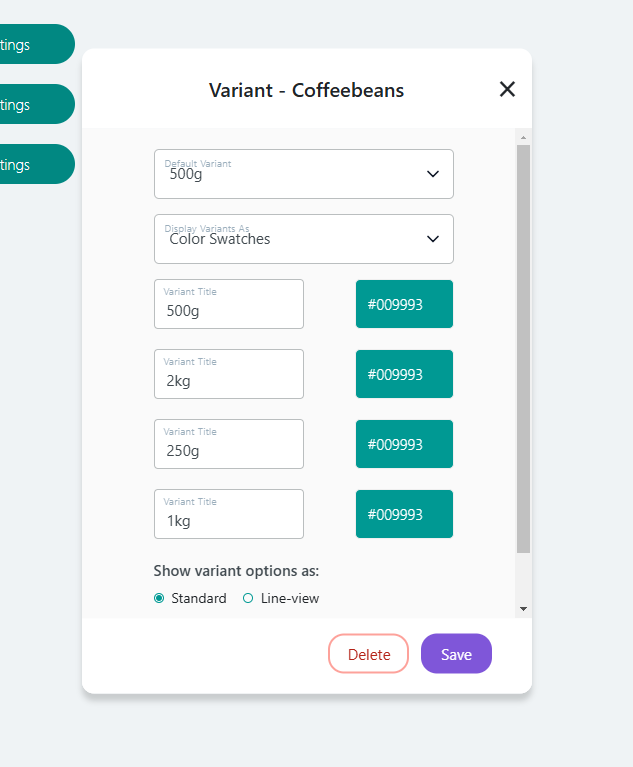
The pop-up enables you to edit;
Default Variant - Which variant should be shown first to your buyers?
Display variants as - Choose between Color Swatches, Thumbnail Images or Drop-down. *Note each color Swatch must be chosen manually. Thumbnail images are pulled from the products default image, but can be changes in the pop-op, by clicking the green "+"
Variant Titles
Thumbnail images or Colorswatches - Depending on which is chosen in Display Variant As
Show Variant options as - Choose between Standart or Line-view
Show products individually(ungroup variant)
Show default product's description in the lineview popup - Only shown if Line-view is chosen in Show Variant options as
Now choose which Variants display is most suitable for your shop and products
Furthermore it's also possible to access other types of edits by clicking the Variants name on the list;
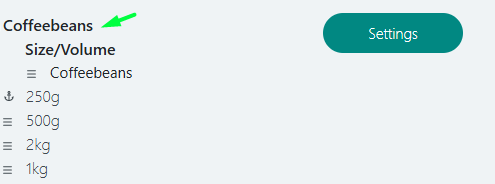
Here it's possible change the order of how the variants, within the variantgroup, is displayed - Simply drag around the variants to your desired order on the 3 horizontal lines;
How to choose Display
To choose which display suits your shop the best, there are a few things to take into consideration;
- What kind of display are your retailers currently used to? Perhaps your retailers comes from purchasing B2B orders through you B2C shop and you commonly use a drop-down to display your products
- What type of products are you selling? Does you products have multiple variants and subvariants(such as clothing in multiple colors and sizes) or only a single variant (such as coffeebags in different weights)?
- What give the cleanest, quickest overview of your products for your buyers?
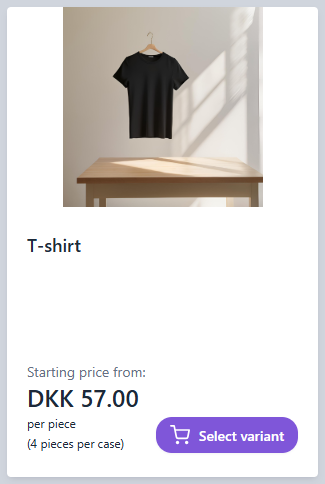
In a example like the T-shirt variant the Thimbnail images or color swatches combined with line-view could be most suitable;
Where as an example like Coffeebeans a drop-down could be more suitable;
*We often recommend to choose the same variant display for all your variants, however it's possible to choose different displays on each variant, as one display might not suit all variants, if you have a broad selection of products.
*Make sure to aim for what gives the most efficient and simple overview of your product selection, to ensure a smooth buying experience for your buyers.
Using the Bulk Uploader to update variants
It's possible to also use the bulk uploader to create or update variants, which is a great tool in terms of working more efficiently.
To find our bulk uploader head to you Tools > Bulk uploader, then choose Products in the drop-down and download the template.
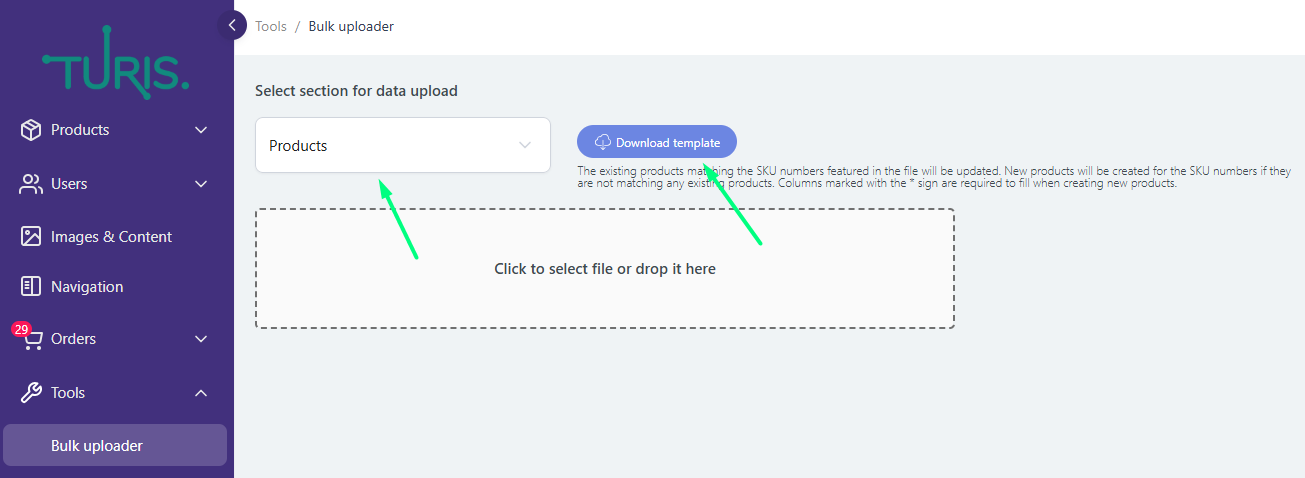
With our bulk uploader, the same conditions applies in conditions of how the columns should be filled - Both Variant, Variant Title and Size/Volume must all be filled for each product entry in the sheet.
On the image below, you can see an example of how this could be filled according to the examples mentioned previously, when creating variants manually on products;
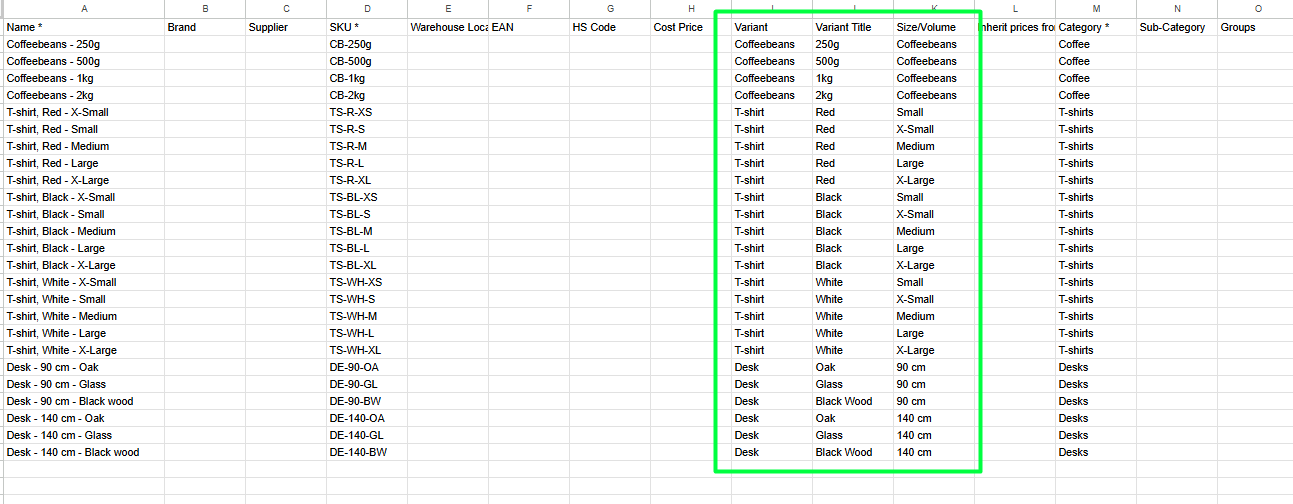
*When using the bulk uploader to update existing products, such as variants it's important to keep the required columns; Name, SKU, Categories, Stock and Case Quantities in the sheets along side the columns you want to update.
Other settings
For variants there are also other settings you can have a look at, such as Langage settings. In you language settings youøre able to manage you language translation and use this to adjust the button shown, when using the option to show variants as Line-view.
As default this button shows "Choose color" on the buyerside of Turis, however this might not fit all your products.
To change this head to your Settings > Languages > Manage translations, and then choose your language in the drop-down (Per default the buyerside in Turis is English)
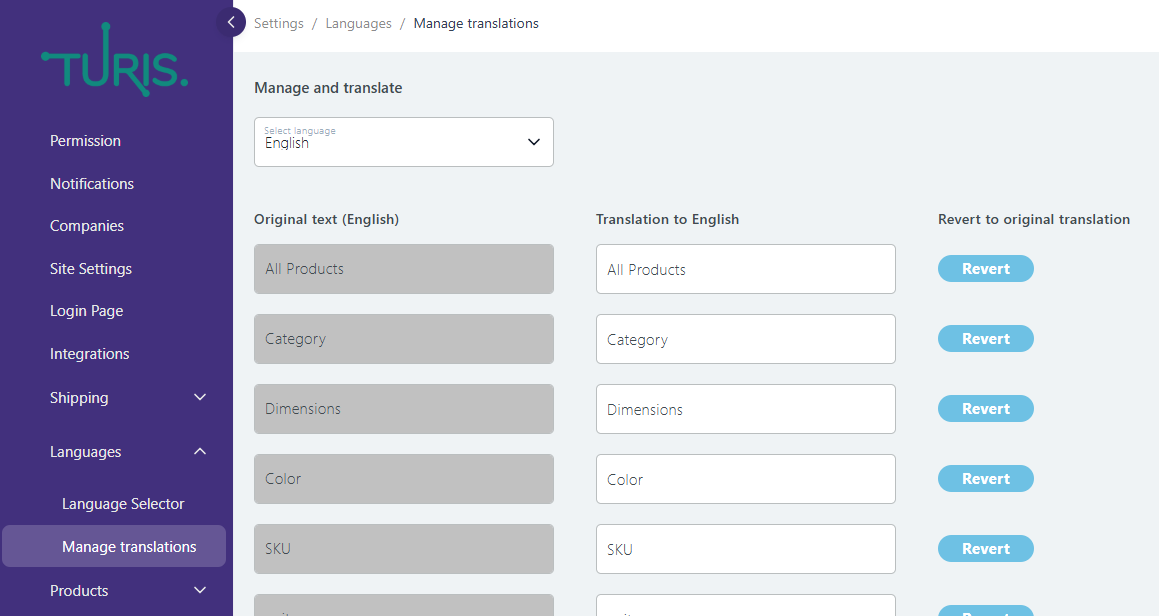
Now you are shown a long list of translation you are able to edit - To edit the button for the variant you should look for the translation "Select sizes" in the list. A clever hack if to search for this by using your keyboard shortcut ctrl+f or cmd+f.

Now edit the translation in the right field to your desired terms;

Then scroll the button of the page and hit "Save" to make sure your changes is not lost.

Now your new translation should be reflected on the buyerside of Turis;
Before;
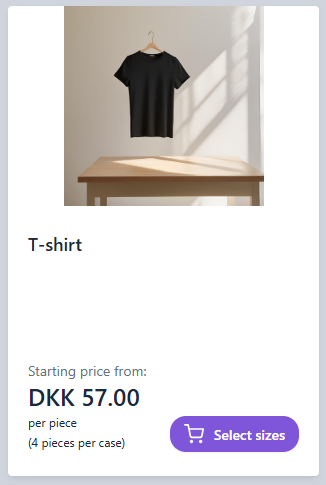
After;
Setting up variants correctly, you make it easier for buyers to browse your products and select the right option without confusion. Whether you're selling clothing in multiple sizes, coffee in different weights, or furniture in various materials, organizing your products with variants ensures a more seamless purchasing experience.
Take advantage of Turis' flexible display options and bulk uploader to streamline the process and keep your webshop looking polished and professional. If you have any questions or need further assistance, feel free to reach out to our support team at support@turis.app —we’re happy to help!