How to create Retailers
Introduction
Creating a retailer in Turis is an essential step for setting up your Turis account. This process enables you to add a new retailer to the system, providing the necessary company and contact information. Additionally, you'll have the option to invite buyers to your B2B webshop, streamlining the order process.
Step-by-Step Guide to Creating a Retailer
Access the Retailers Section: To begin, click on 👤 Users in the left-hand menu and select Retailers. Here, you'll find the option to create a new retailer.

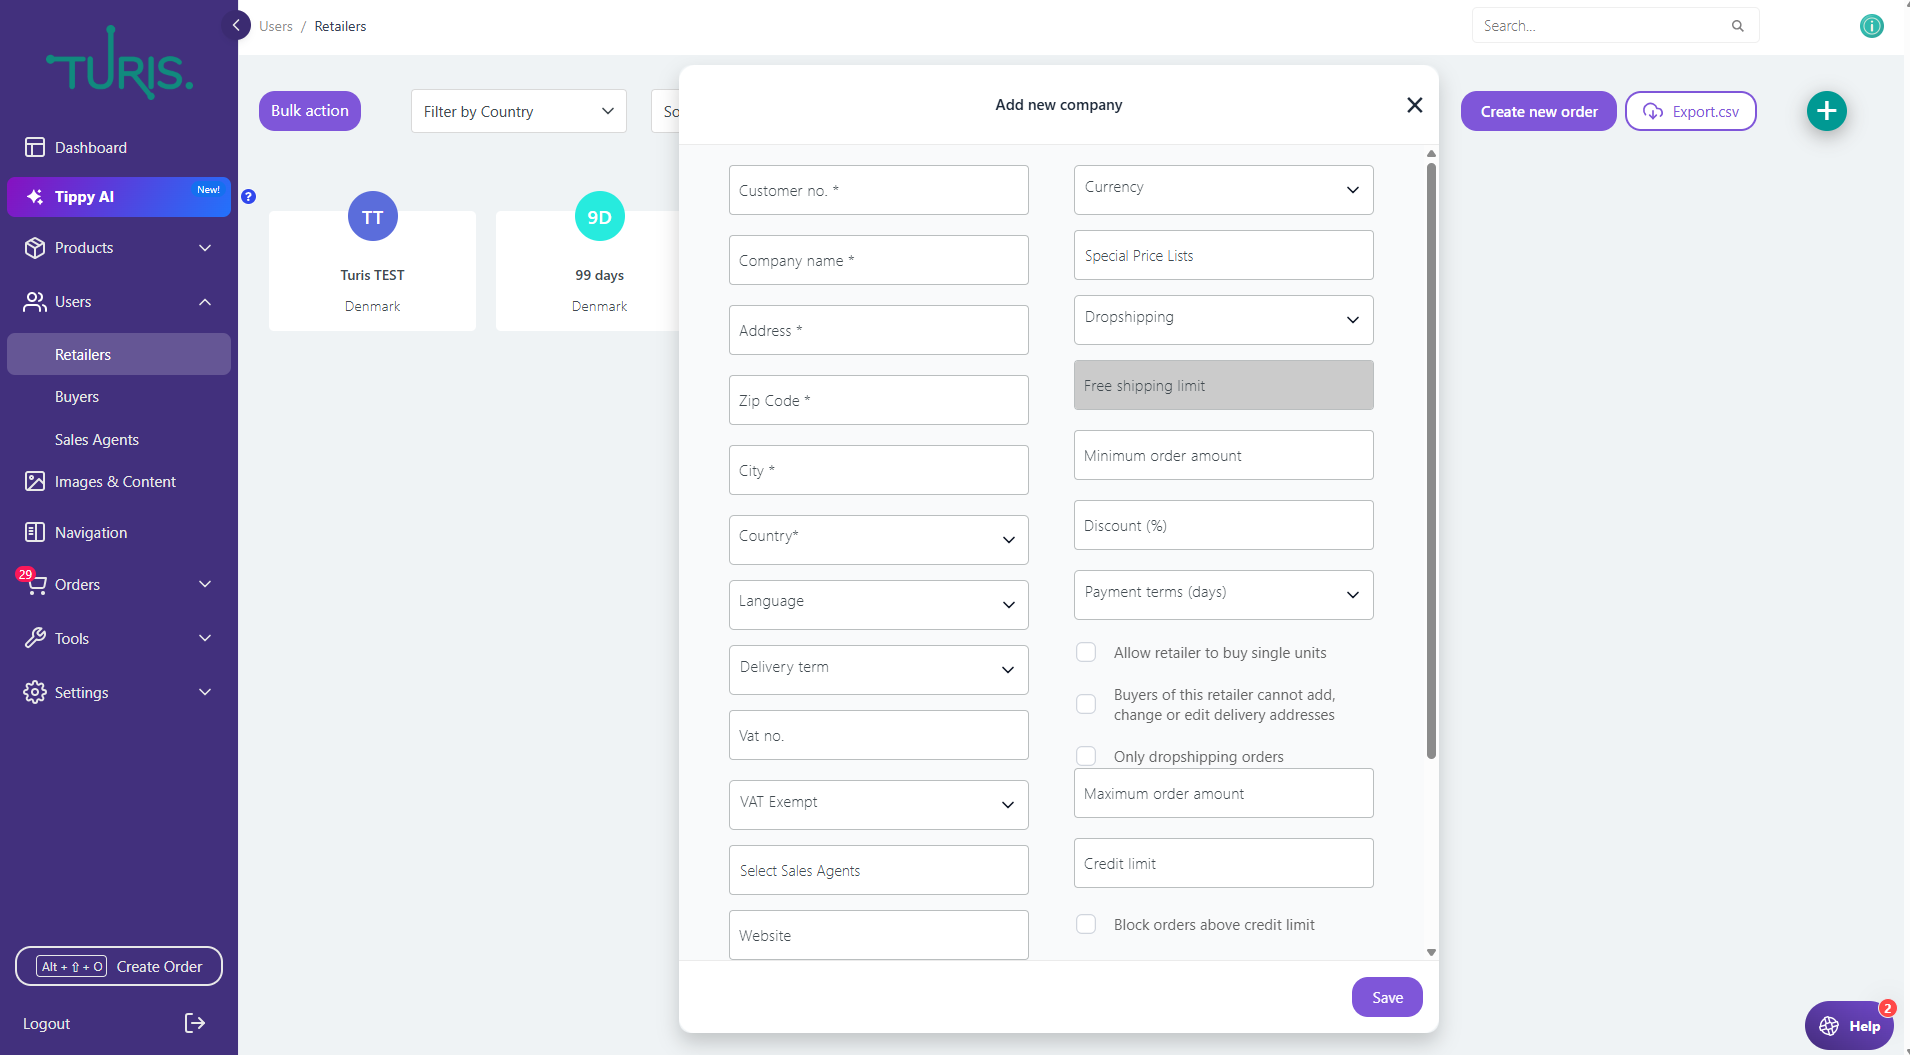
Enter Retailer Information: Click the "+" button in the upper right corner to begin entering retailer details. The required fields include:
- Company Name
- Address (Invoice Address)
- Zip Code
- City
- Country
- VAT Number
- Currency

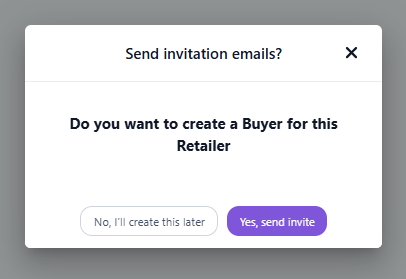
Save and Invite Buyer: After filling out the necessary details, you’ll be prompted to either:
- Save the Retailer: You can complete the creation in Users > Buyers and send the invitation later.
- Send Invite Now: If you choose this option, you’ll automatically create a buyer for the retailer and send an invitation to allow them to log in to your B2B-shop.

Editing a Retailer
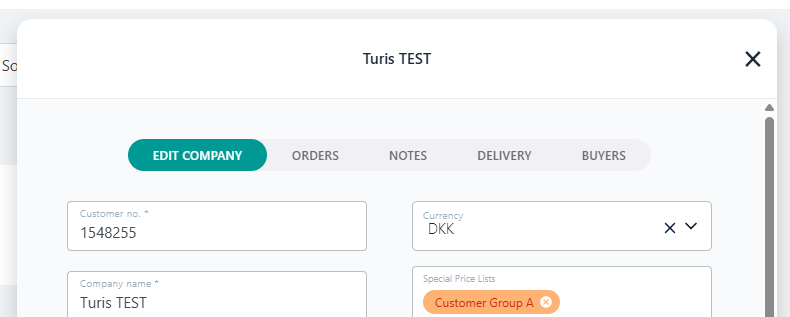
To modify any retailer's details, simply click on the retailer you want to edit. Here, you can:
- Edit Company Information: Update any company or retailer details.
- Manage Orders: View and manage all orders placed by the retailer.
- View Notes: Check any notes og files added to the retailer by an Admin or Sales agents.
- Modify Delivery Addresses: Edit or update the retailer’s delivery or invoice addresses.
- Manage Buyers: View all buyers linked to the retailer.
Remember to save changes once they’re made.

Advanced Retailer Settings
Allow Sign-Up via Company Domain: This feature is for retailers who can sign up using their company email domain. If enabled, it allows Turis to link retailers with the same domain to each other. It’s recommended not to activate this option for generic email domains (e.g., Gmail, Yahoo).
Allow Single Unit Purchases: Retailers can be given the option to purchase individual units of products, even if products are typically sold in larger quantities (e.g., a case).
Restrict Delivery Address Changes: This feature prevents buyers from altering or adding new delivery addresses, ensuring consistency in the delivery process.
Only dropshipping orders: This will only allow buyers of this retailer to place orders, which are dropshipping.
Block orders above credit limit: This limits the buyers of this retailer place any order above the set Credit limit.
Understanding Retailers vs. Buyers
- Retailer: Refers to the company or store, whether physical or online, that purchases your products.
- Buyer: The individual person within the retailer who places orders for the products.
By following these simple steps, you can efficiently create and manage retailers within Turis, streamline order management, and ensure a smooth connection between retailers and buyers. With added options for customization, such as allowing single-unit purchases or restricting delivery address edits, Turis offers flexibility to meet your sales needs.
